
latest
habitat tv

Say goodbye to the morning scramble for keys, coats and sunglasses and hello to this… see this and more videos
blog

Textured and timeless: Muros Wall Panels in a bold interior
Homeowners Jude and Adam have embraced the beauty of dark, dramatic interiors, transforming their living… more

Hop into the Easter spirit with these family friendly DIY projects!
10 Apr 2025
Easter is looming and we’ve gotsomehopping fun DIYs that you can do at home with the whole family. Get the kids involved to pick out their favourite Resenetestpot colours at your local Resene ColorShop and try out these fun projects for yourself!
Three lucky bunnies

If you like to keep things simple when it comes to Easter decorating and prefer a more neutral colour palette then this set of wooden bunnies could be a project worth trying. These are made from inexpensive wood panels and require you to draw the shape onto the boards, cut out with a jigsaw and stain. This bunny trio looks great on an entry table or even outside the front door!
You will need:
3x pieces of pine which are 1.2 cm in length, 14cm wide and 18mm thick
Sandpaper
Pencil
Jigsaw
Paintbrush
Resene Colorwood wood stains in your chosen shades. We used Resene Colorwood Ironbark, Resene Colorwood Bask and Resene Colorwood Walnut
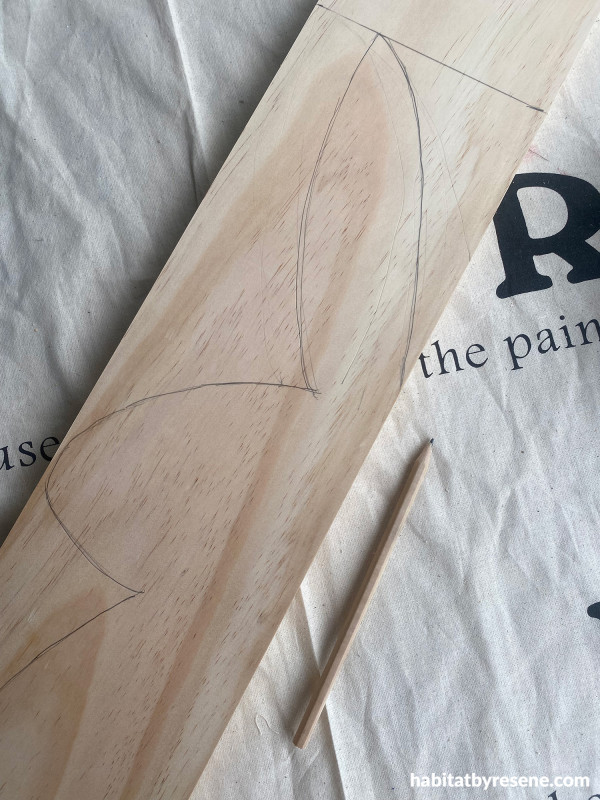
Step 1: Take your three pieces of pine and measure one at 90cm in length, one at 80cm and one at 60cm, then draw the bunny’s body onto the pieces of pine in pencil ready to cut out.
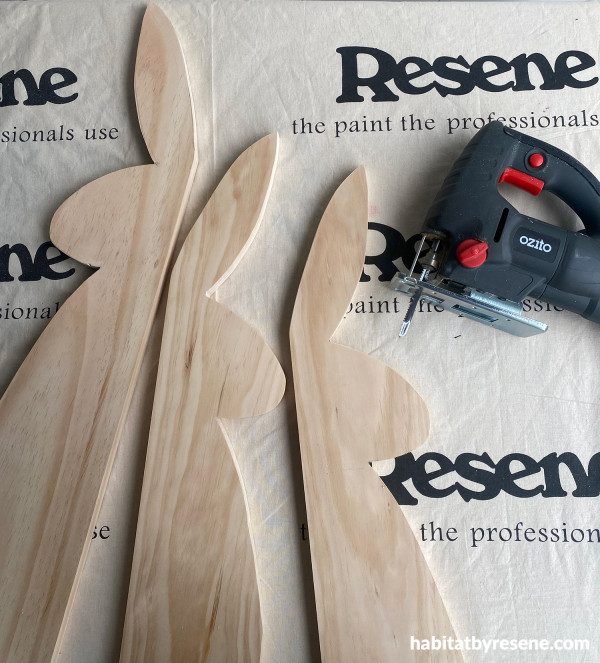
Step 2: Cut out the bunny shapes using a jigsaw and give theedges a light sand if needed. Wipe off the sanding dust with a damp cloth.
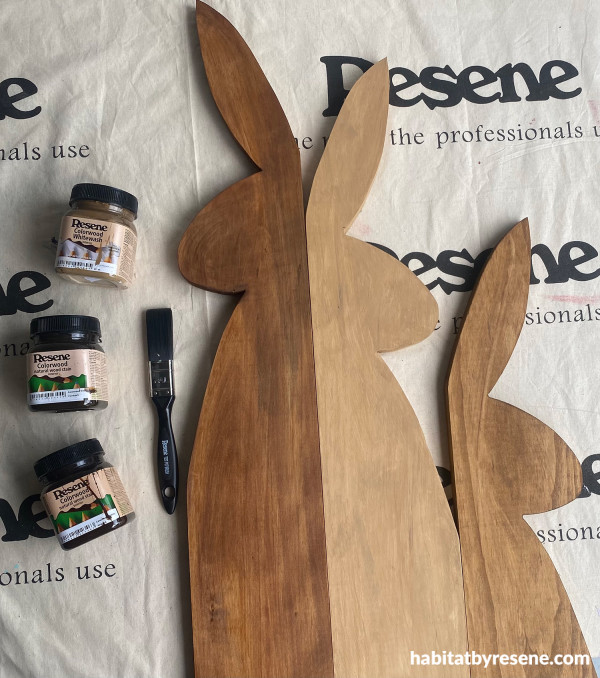
Step 3: Stain the wooden rabbits using a brush in your chosen Resene Colorwood shades. We stained the tallest bunny in Resene Colorwood Walnut, the medium size bunny in Resene Colorwood Ironbark and the smallest bunny in Resene Colorwood Bask. If preferred you can apply the stain with a lint-free cloth.
Step 4: Pop your bunnies on your console, hallway table or by the front door.
Top tip: If you’re keen to display your bunnies outdoors, swap out Resene Colorwood for Resene Waterborne Woodsman wood stain.
Wall painted in Resene Half Doeskin and table in Resene Double Rice Cake.
Chick-or-treat

We love a good recycling project! These chick treat pouches use toilet roll tubes, though you could also use paper towel rolls if you like. These little cuties are sure to be a hit this easter and can be made very quickly using Resene testpots and cardboard.
You will need:
Toilet or paper towel rolls
Sheet of A4 cardboard
Scissors
Fine paintbrush
Paintbrush
Clear craft glue
Pencil
Stapler
Treats
Resene testpots in your chosen colours. We used Resene Sweet Corn, Resene Quarter Turbo, Resene Princess, Resene PotPourri, Resene Riptide, Resene Scandal, Resene Guggenheim and Resene Black
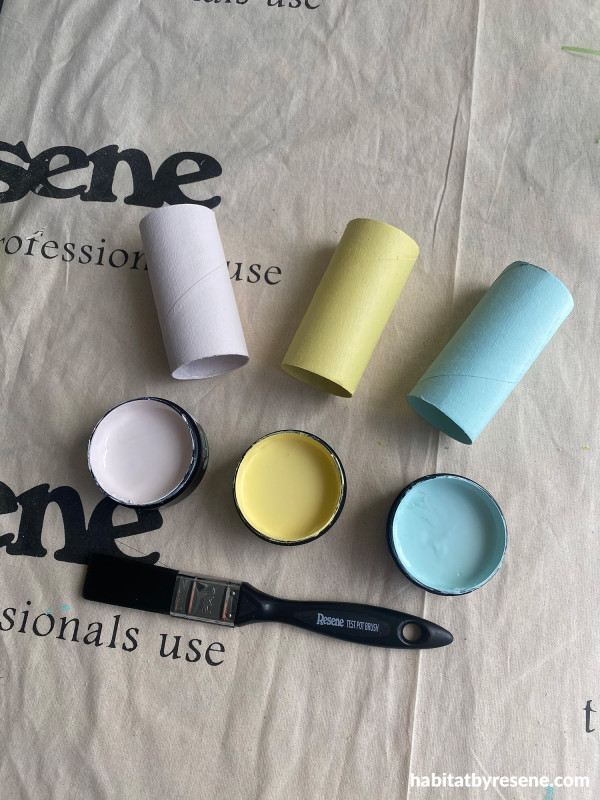
Step 1: Paint your rolls in your chosen Resene colours. We used Resene Sweet Corn, Resene PotPourri and Resene Scandal.
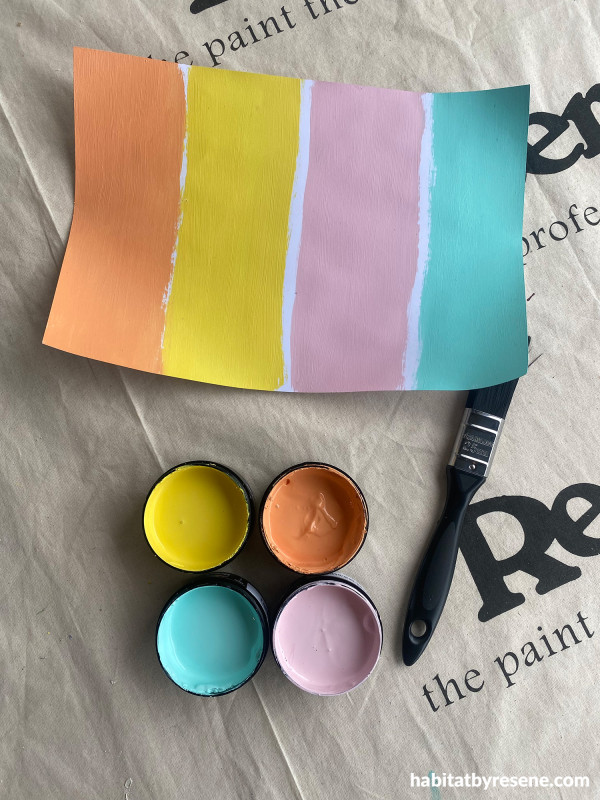
Step 2: Take your sheet of A4 cardboard and paint four stripes in your chosen colours. We painted one in Resene Quarter Turbo, one in Resene Princess and one in Resene Riptide.
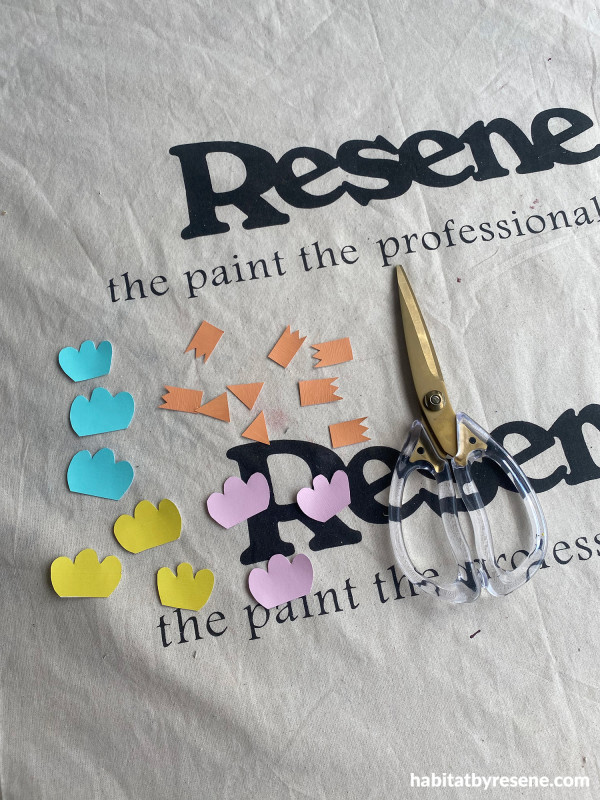
Step 3: Draw your feet, beak and wings onto the cardboard pieces and cut them out.
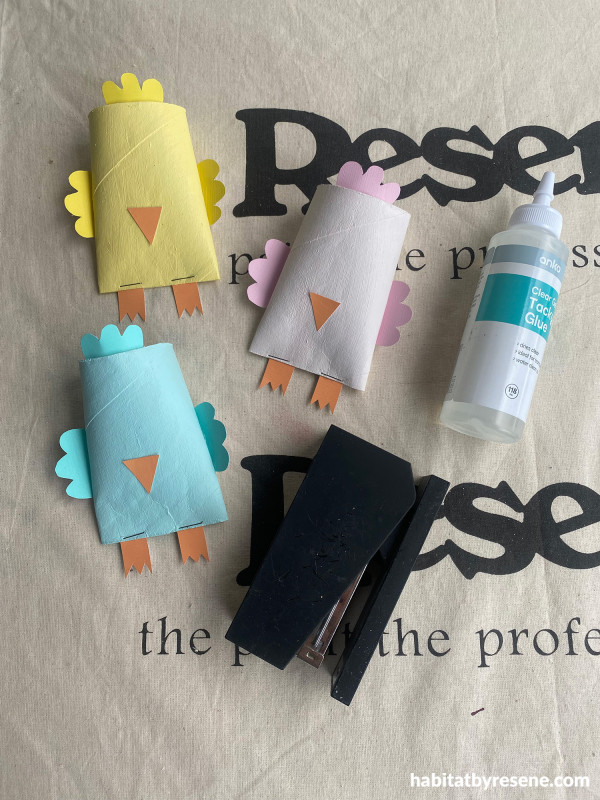
Step 4: Push the ends together at one end of the roll and then tuck in the painted feet and staple to close up the pouch. Using clear craft glue, stick the painted beak and wings onto the painted pouches.
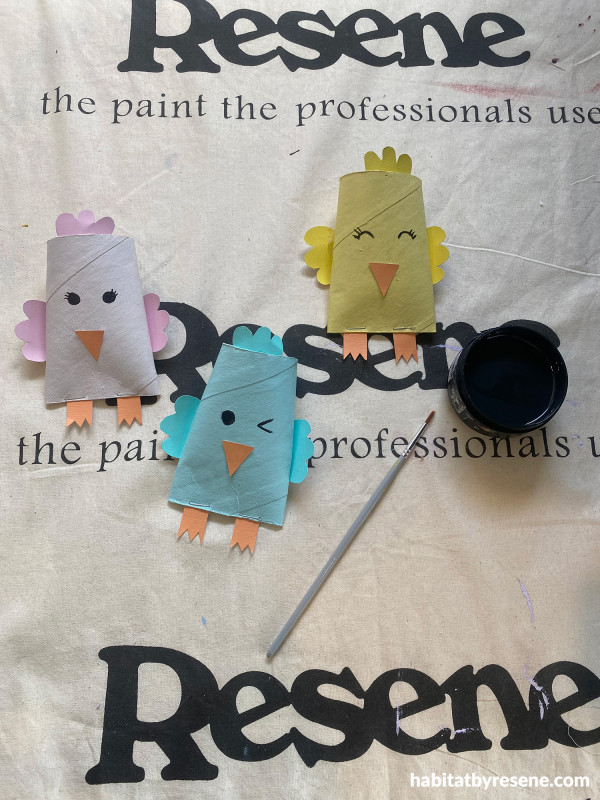
Step 5: Using a fine paintbrush paint your faces onto the pouches in your chosen colour. We used Resene Black for this.
Step 6: Pop in your treats and give to friends and family.
Top tip: Add a little extra dazzle to your pouches to match the metallic shine of your Easter egg wrapping with Resene FX Metallic paint testpots.
Background painted in Resene Half Thorndon Cream.
Eggs-traordinary emojis

If you’re looking for a fun Easter craft to do with the kids or a gift idea for nieces and nephews, then this cute emoji egg project could be just what you’re looking for. Simply take some wooden easter eggs and some of your favourite Resene testpots and let the kids paint some faces on them.
You will need:
A small egg carton
6 wooden eggs (Ours were 7cm in length and approx. 4cm wide)
Paintbrush
Fine paintbrush
Resene testpots in your chosen colours. We used Resene Turbo, Resene Black, Resene White, Resene Havoc and Resene Malibu
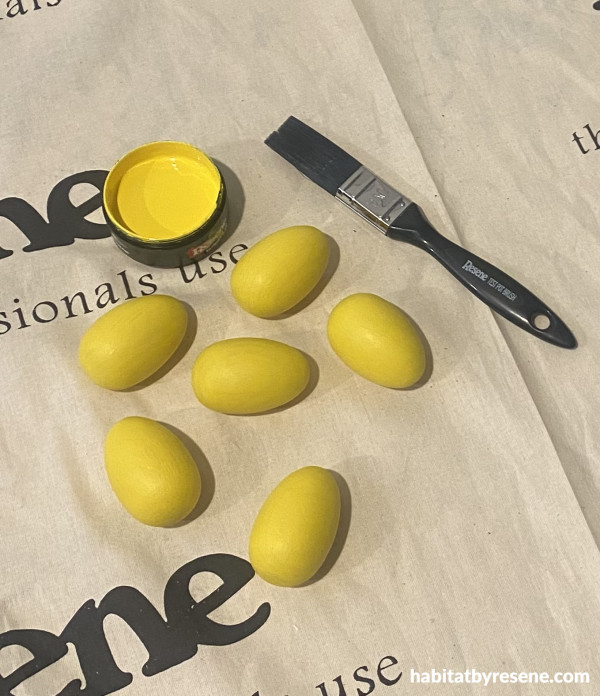
Step 1: Paint your wooden eggs in your chosen colour. We used Resene Turbo. You will need two coats for best coverage.
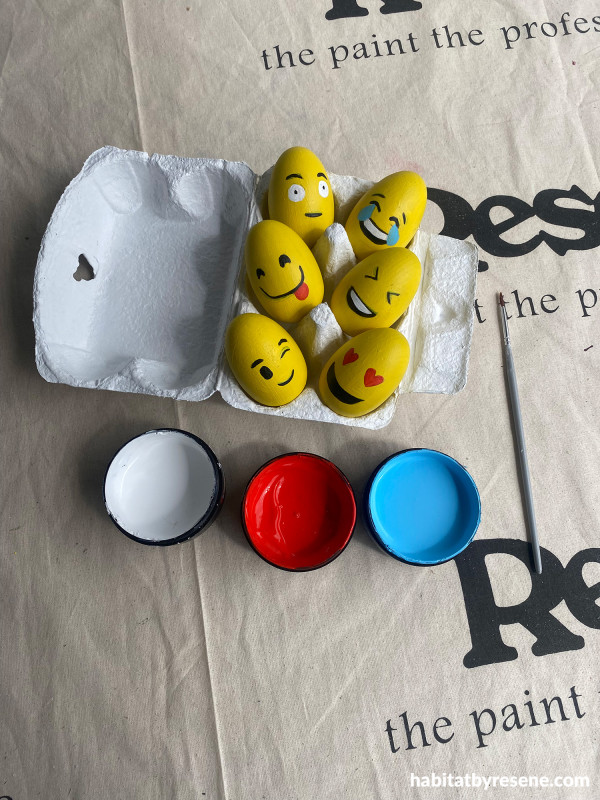
Step 2: Using a fine paintbrush, paint your faces onto the eggs using your chosen Resene testpots. We used Resene Havoc, Resene Malibu, Resene White and Resene Black.
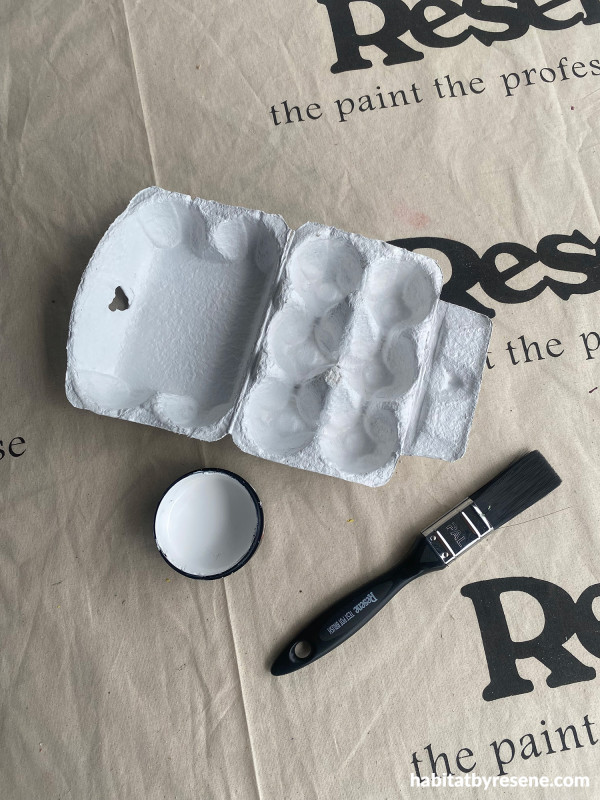
Step 3: Paint your egg crate in another of your chosen colours. We used Resene White for ours.
Step 4: Pop in your eggs and give to friends or family or simplyhave fun playing with them.
Top tip: Paint your eggs to look like family members using Resene testpot paints and hide them so each family member can find their own as part of your Easter egg hunt!
Background painted in Resene Half Thorndon Cream.
projects Vanessa Nouwens
images Bryce Carleton
Published: 10 Apr 2025
more inspiration

Back to essentials: Nature-inspired wallpapers that ground and soothe
The Resene Essentiell Wallpaper Collection is inspired by the raw… more

Egg-stra special Easter DIYs for the whole family!
We’ve got more fun and creative Easter DIYs for you… more

Favourite finds: Our top picks for rustic, farmhouse and vintage vibes
Favourite Finds is back to showcase the best in home… more

Elevated living spaces: Seamless style and function with AVENTOS top
Most of us have had moments of cluttered kitchen benchtops… more

Authentic and balanced: The grounding hue of April
Color Marketing Group (CMG) have announced the latest hue that… more


 look book